3 Steps to Getting More Clients on LinkedIn: Your Ultimate Guide

More and more steady, high-paying clients are looking for freelancers on LinkedIn—and checking out our profiles before deciding whether to contact us. That’s great news—because it’s so much easier when clients find us.
But if you’re not using LinkedIn effectively, clients won’t find you.
Colleagues use LinkedIn too to check us out before deciding whether to make a referral to us for freelance work. If you don’t have a compelling and professional profile, they won’t refer the work to you.
Using LinkedIn effectively isn’t difficult. And you won’t be wasting your time. You only need three things:
-
- A complete, client-focused LinkedIn profile
- A big relevant network
- Some activity.
Here at The Mighty Marketer, I’ve been helping freelancers learn how to use LinkedIn effectively and efficiently since 2014. In this guide, I give you a proven 3-step process for doing this.
10 minutes a day on LinkedIn for freelancers
Once you’ve developed your profile and started building your network, you only need to spend about 10 minutes a day (Monday through Friday) on LinkedIn to help grow your freelance business.
Let’s get started!
In This Guide
How Clients Find Freelancers on LinkedIn
 LinkedIn won’t tell us much about its search algorithm, which it constantly changes. Here’s what I know from the experts I follow (this information is current as of January 2024).
The search algorithm shows results by:
- Profile completeness and relevant keywords in the headline
- Common connections with the person who is doing the search
- Connections by degree (1st, 2nd, or 3rd)
- Your activity
- Your skills.
Develop a Complete, Client-Focused LinkedIn Profile
When clients search for a freelancer on LinkedIn, profile completeness is a key part of the #1 criterion LinkedIn uses in providing search results. And a client-focused profile keeps the attention of clients who find you—and makes them want to learn more about you.
Complete Your Profile
Only 51% of LinkedIn members have complete profiles. So just by completing your profile, you’ll stand out in a sea of freelancers.
Completing your profile is super easy. A complete profile, according to LinkedIn, has the right content and at least 50 connections. Connections aren’t actually part of your profile, but LinkedIn still includes this as part of a complete profile.
To complete your profile, you need to include:
- A profile photo
- Your location
- Your industry
- Your education
- Your current and 2 past positions (Experience)
- At least 3 skills
Your industry doesn’t show on your profile but LinkedIn’s algorithm uses it in helping match clients with the right freelancers.
Your current and 2 past positions go under Experience. Your freelance business is your current position.
Use a Professional Photo
Experts say that people with profile photos get 14-21 times more profile views than people without photos.
And having a professional photo on your LinkedIn profile makes it much more likely that clients will take you seriously. A professional photo shows the client that you’re a professional, and that you’re worth the money they’ll pay for your services.
It’s best to hire a professional photographer to take your photo, which you can also use on your website and in other marketing. A professional photographer will make you look your best, even if you’re like me and hate to be photographed.
If you don’t hire a pro, don’t use a selfie. Make sure the background for your photo is neutral and clean. Make sure your face is centered and there’s a little space over your head. Don’t include your pet or kids in your LinkedIn photo.
Photo size
- 400 x 400 pixels
- Maximum size 10MB
Use an Effective Banner Image
While not part of a complete profile, your banner image is crucial. The banner image, sometimes called the cover photo, is the bar at the top of your profile that includes your photo. Your photo is on the left in the banner image.
The default banner image is fine. If you use a custom image, make sure it’s clear and looks great as part of your profile.
Banner image size
- 1,584 x 396 pixels
- Maximum size 4MB
Include Your Skills on LinkedIn
People with at least 5 skills get 17 times more profile views than people without skills, say some experts. If you list skills that are relevant to your freelance work, this will help you rank higher in search results.
Include Your Industry on LinkedIn
Your industry doesn’t show but it’s a key part of LinkedIn’s search algorithm. If you want to have a complete profile and rank higher in search results, include your industry.
Include Your Experience on LinkedIn
Under Experience, your freelance business is your current position. Include “freelance” in your title followed by what you do (e.g., freelance writer or editor). And you can repeat some of the information from About here. Continue to include relevant keywords.
If you’ve had professional jobs before becoming a freelancer, list at least two of them here.
Include details that are relevant to your freelance work and your target clients.
Include Your Contact Info
Contact info, isn’t part of a complete profile, but you need to make it easy for clients to contact you. Include at least your email address and, if you’re comfortable, your phone number in Contact Info and again in About. Also include your website in both places. This is basic, but freelancers often forget to do this.
Write a Client-Focused Profile
 A client-focused profile shows that you understand client needs and can meet their needs. It includes the keywords that clients use to search for freelancers like you and clearly says:
- What you do
- How you help your clients.
Focus on Your LinkedIn Profile Headline
The most important part of your LinkedIn profile is the headline. A compelling, client-focused headline will help you:
- Rank higher in search results when clients are searching for a freelancer
- Impress clients who click on your profile
- Get more referrals from colleagues.
LinkedIn’s limit for headlines is 220 characters. But that’s too long for a compelling, client-focused and scannable headline.
I recommend using about 120 to 170 characters for your headline. My headline is just 143 characters, and I include information about The Mighty Marketer.

But if you need a little more space to write a compelling, client-focused headline, expand your headline. Just don’t feel like you have to write more now.
Clearly say what you do and how you help your clients. Use relevant keywords to rank higher in search results, especially “freelancer” and “freelance [writer, editor, etc.]” and your services. You can also include the type of clients you work with or other key information.
FREE TOOL: Ultimate Linked In Profile Checklist For Freelancers
See examples of dull headlines and compelling, client-focused headlines.
Make About Engaging and Relevant
About is the second most important part of your profile, after your headline. LinkedIn has also increased About from 2,000 to 2,600 characters. Like the longer headline, having more space for About can be helpful. But it may not be necessary.
Here’s why. People—especially clients—are busy. And they have very short attention spans.
So you need to offer clear, concise client-focused messages and brief, scannable content to show how you help clients meet their needs.
What shows before people have to click see more—the first 220-270 characters (about 102-167 characters on mobile)—matters the most. Start with a clear, concise client-focused message that builds on your headline and engages clients. Then briefly summarize your relevant experience and background.
Use bulleted lists to make services and other content scannable. Also make your About section scannable by using short sentences and short paragraphs.
Here’s the beginning of my About section (or see it online).

Continue to use the keywords that clients are likely to use to search for a freelancer like you throughout About. Clients often look for keywords related to titles, so use “freelancer” instead of “freelance services,” and “freelance medical writer” (or “freelance ADD YOUR FIELD HERE”) instead of freelance medical writing.”
Use other keywords related to your services that people will search for, like:
- The type of clients you work with
- Your key services
- Industry-specific keywords.
Focus the rest of About on how you help your clients meet their needs. Briefly summarize your services, and your relevant experience and background. Use bulleted lists for your services and anything else that works well in a list.
A call to action tells clients what you want them to do. The call to action can invite clients to call or email you, visit your website, connect on LinkedIn, or any combination of these. Include a call to action, with your contact information, at the end of About.
Your LinkedIn profile is a marketing tool, not a resume. Make it easy to read (conversational)and interesting. Use:
- Short, action-oriented sentences
- Short paragraphs
- Subheads (in all caps)
- Bulleted lists.
Use the Featured Section Effectively
The Featured section lets you display your best work and market your freelance business to anyone who looks at your profile. It’s prime LinkedIn real estate: below About and above Activity.
If you use Creator mode, then Featured is before About.
You can use Featured to show things like:
- Work samples
- Website
- LinkedIn posts
- More.
For most freelancers, samples will be the best way to use featured.
Other LinkedIn Profile Sections
Other sections of your profile are also helpful on LinkedIn for freelancers are volunteer experience and accomplishments.
If you volunteer, including for professional associations, create a volunteer section. This is especially helpful if you’re:
- A recent college graduate with little or no work experience
- A new freelancer.
Under accomplishments, you can list:
- Projects
- Organizations
- Courses
- Publications
- Certifications
- Honors & Awards
- Patents
- Test Scores.
The 2 most relevant types of accomplishments on LinkedIn for freelancers are projects and organizations. Adding relevant projects that you’ve worked on lets you highlight your skills and experience and helps you rank higher in search results. You can include projects from school here, which is helpful to recent college graduates.
Under organizations, add your professional associations and your role in them (e.g., member, committee member, or officer).
If you’re a recent college graduate or a new freelancer who’s taken relevant courses, add some courses too.
If you have other accomplishments that fit these categories include them.
More Ways to Make the Most of Your LinkedIn Profile
As you’re finishing your profile:
- Proof for errors and on mobile and computers.
- Create a custom URL
- Make sure your profile is publicly visible.
Proof for Errors
Proof your LinkedIn profile carefully for errors and on mobile and computers. Make sure it looks great on smart phones, tablets, and computers.
Create a Custom URL
Make it easier for clients to find you with a custom LinkedIn URL. This also makes you look more professional.
Make Sure Your Profile is Visible
If you want clients to find you on LinkedIn, make sure your profile is on for public visibility.
Learn more about developing a client-focused LinkedIn profile
The Ultimate LinkedIn Profile for Freelance Success This Year
Free tool: The Ultimate LinkedIn Profile Checklist for Freelancers
Build a Big, Relevant LinkedIn Network
 When clients search on LinkedIn for a freelancer like you, your connections matter—a lot. Here’s why.
Connections are the #2 LinkedIn criterion in ranking search results. So if you have a big, relevant network, you’ll rank higher in search results when clients are looking for a freelancer.
Having a big, relevant network also helps you get more out of your LinkedIn activity, covered next. You can:
- Show your expertise to more clients and colleagues
- Meet other freelancers and strengthen relationships with freelancers you already know.
- Learn how to better manage your business by reading the posts of your connections.
Relevant connections are people who:
- Work in your industry(ies) and specialties
- Do similar work
- Are related to you and your work in another way .
Levels of Connections on LinkedIn
LinkedIn has three levels of connections: 1st, 2nd, and 3rd degree. The closer your connections are with the person who is doing the search, the higher you’ll rank in search results.
1st-degree connections are your direct connections Either you invited the person to connect with you or he/she invited you to connect with him/her.
2nd-degree connections are connections of your 1st-degree connections.
3rd-degree connections are people who are connected to your 2nd-degree connections. If their first and last names show, you can click Connect to invite them to be part of your network. If only the first letter of their last name shows, you won’t have an option to click Connect.
LinkedIn has chosen 500 as the “magic” number of connections. That’s enough to rank higher in search results when clients are looking for a freelancer.
Once you reach that, your profile will say “500+ connections.” No one knows whether you actually have 500 or 30,000—the maximum—connections.
How to Get 500+ LinkedIn Connections Fast
People are much more likely to connect with you if you send them personalized invitations. When you invite someone to connect with you on a desktop computer, LinkedIn will prompt you to customize the invitation.

Mention what you have in common or why you want to connect. For example, you could write:
“I see we’re both freelance writers and I’d love to connect with you on LinkedIn”
OR
“I loved your post on XYZ. Please join my LinkedIn network.”
If the person is a potential client, mention something about his/her career or company or something you have in common (like graduating from the same college).
Here are 9 more ways to build your LinkedIn network:
- Use the member directories of professional associations
- Follow up on networking contacts
- Invite clients and past clients
- Invite past co-workers and classmates
- Invite connections of your closest connections
- Check out people you may know
Followers Versus Connections
When members choose Creator mode, Following is the default. All members can also choose follow as the default.
If you follow someone, you are NOT connected with them.
You will see content for people you follow and your connections.
You can connect with people who have follow as the default. But this is different than how you connect with other people.
To connect with people who have follow as the default click on the person’s profile. Then there are 2 ways to connect with the person:
- Click on Connect near the Follow button.
- Click on More and choose Connect.
Learn more about being active on LinkedIn
10 Ways to Get 500+ Connections on LinkedIn Fast
Increase Your Visibility Through Activity
 Activity is LinkedIn’s #4 in search algorithm criteria. So if you’re active on LinkedIn, you’ll rank higher in search results.
The more active you are, the more people who will see your content. Along with ranking high in search results, being active will help you build your network and enhance your professional reputation.
You only need to spend about 1 hour a week on LinkedIn activity to get results.
How to Be Active
The key parts of LinkedIn activity are your comments on other people’s posts and your content. Posts are the easiest type of content to do so that’s what I focus on in this guide.
Articles are helpful if you need some writing samples. But they don’t help you be more visible than posts.
Videos are popular but it takes expertise and effort to do high-quality videos. So unless you do videos for clients and have the expertise to produce high-quality videos, focus only on posts.
Whether you’re posting your own content, responding to comments on your posts and articles, or commenting on other people’s posts and articles, always be professional and helpful.
Getting Started on LinkedIn Activity
If you’re just starting to be active on LinkedIn, comment on other people’s posts for a while. Once you get comfortable doing that, you can write your own posts once or twice a week.
Review your LinkedIn feed—the content that shows up when you click on your LinkedIn home page—2-3 times a day.
Look for relevant posts by relevant people to comment on. Doing this will help you rank higher in search results than just commenting on any posts. Plus, you’ll learn things that will help you build your business and grow your LinkedIn network.
There are 4 ways to engage with other people’s posts:
- Like
- Comment
- Repost
- Send
 Liking is, frankly, lazy. The person who wrote the post isn’t likely to notice your Like and this won’t help you build a relationship with them.
Commenting is the “gold standard” of engagement. This is the best way to engage others, and it’s easy to do.
Every comment is a mini-ad for your business because your name and the beginning of your headline show before your comment, along with your photo.
Reposts, which used to be called Share, seems to be a good way to engage others. When you repost, LinkedIn shares the post with your network. But LinkedIn’s algorithm doesn’t like reposts so they won’t get many views.
Reposts are most helpful in building your relationship with the person who did the post.
Send is useful. This feature lets you directly share a post with a person or people who will find it relevant and useful. This is a great way to build your relationship with the person or people you send the post to.
Write meaningful comments
Whether you’re commenting on other people’s posts or responding to comments other people make on your posts, LinkedIn’s algorithm favors meaningful comments related to the post’s content.
Read the post and if it has a link, read, listen to, or watch the linked content. Find something you can mention in your comment related to the post or linked content. meaningful comments add value to the conversation. Share your experiences, insights, or opinion or show support.
Always be polite, professional, and positive in your comments. Avoid controversy.
Here’s an example of one of my posts and one comment on it.
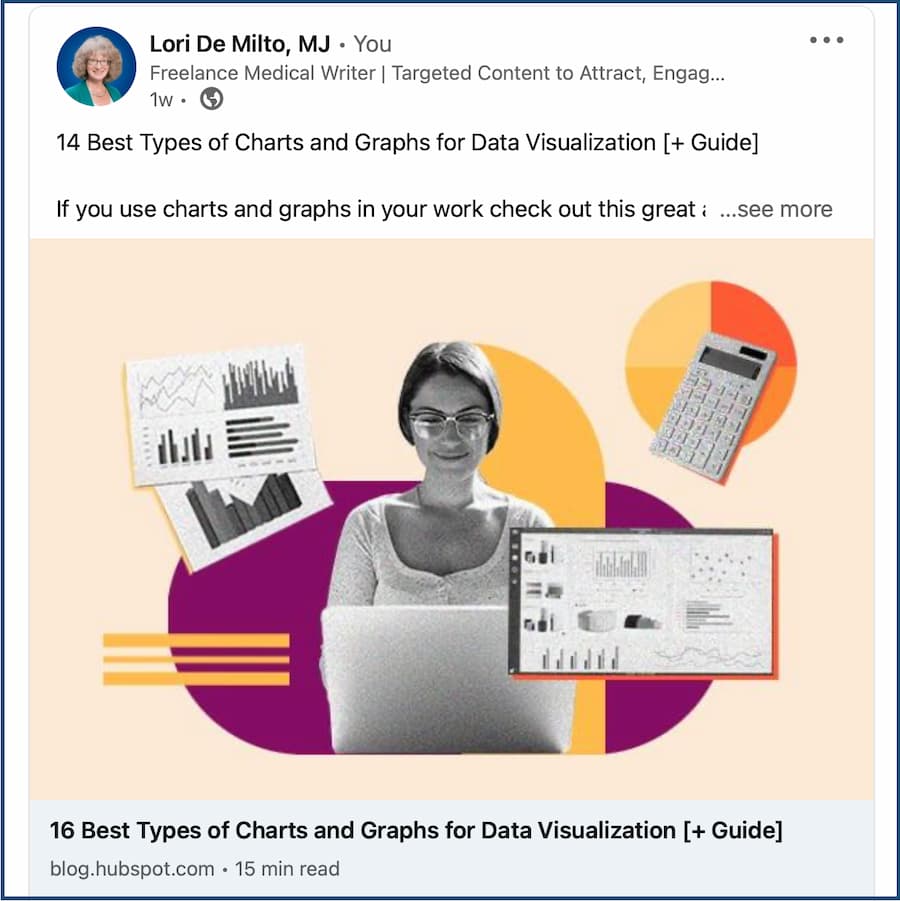

Share knowledge and advice
Once you’re comfortable on LinkedIn, share relevant content once or twice a week. Every post is a mini-ad for your freelance business. Like comments, posts show your name, the beginning of your headline, and your photo.
Some experts say the ideal post length for engagement is 1,300 to 2,000 characters with spaces.
Other experts recommend shorter posts. So I’d say to stay under 2,000 characters and focus on including useful information. If a post is less than 1,300 characters, that’s fine.
LinkedIn’s algorithm prioritizes posts and articles that offer knowledge and advice and shares those posts with users who might find them useful. So LinkedIn will share posts that contain “genuine knowledge and advice”” more widely than other posts.
Types of posts
LinkedIn is about sharing relevant content and engaging with others, not shameless self promotion. Follow the 80/20 rule:
- 80% of your posts should be relevant and helpful
- 20% of your posts can be gently self-promotional.
Common types of posts are:
- Informational or educational
- Professional personal stories
- Questions
- LinkedIn polls
- Carousels
Most of your posts will be informational or educational. This is where you share your knowledge, news, tips, or advice about topics and industries that are relevant to your work and your connections.
Many of these will be curated content, where you’re sharing content from other people or organizations, with attribution.
Professional personal stories are another way to share your knowledge or advice about relevant topics by describing your personal experiences with the topic. You can also ask questions based on your experiences.
People like question posts and LinkedIn polls because they like to give their opinions and advice.
You can ask questions in a regular post or use a poll. If you ask a question in a regular post, you can add details about the question and start a discussion.
Document carousels, which look like slides, are fun and effective when done right.
Where to get great ideas for posts
It’s easy to find ideas for relevant content for your posts. You can share a variety of content on LinkedIn, including:
- Advice and tips about relevant topics and industries
- News and updates about your industry or specialty(ies)
- Other useful free content, like blog posts, industry reports, podcasts, and webinars
Choose a few relevant topics that interest you and your audience. Choose topics where you have expertise so LinkedIn will share your posts more widely. For example, I post mostly about freelancing; productivity; mindset; and health, medicine and medical writing. If you consistently post about a few topics, then LinkedIn is more likely to show your posts to more people. And you’ll build a reputation as an authority on those topics.
Develop a content library so you always have ideas to write about. If you sign up for e-newsletters, content ideas will come right to your inbox. Professional associations are also a great source of relevant content.
Learn more about being active on LinkedIn
How to Use LinkedIn Algorithm Changes to Boost Your Visibility
How to Be Active and Effective on LinkedIn Even if You Hate Social Media
Next Steps
Congratulations on making it to the end of this guide! By now you should understand why LinkedIn is so important to freelancers and the 3 steps you need to take to get more clients on LinkedIn:
- Develop a complete, client-focused LinkedIn profile
- Build a big relevant network
- Be active.
I wrote this guide because learning how to use LinkedIn effectively and efficiently is hard for most freelancers. And I hope that by now you feel confident enough to start making LinkedIn a key part of your strategy for getting the steady, high-paying clients you deserve.